This is mostly just:
- a lightening fast intro to very specific parts of bead making history just for a little flavour
- a introduction to the very basic, beginner friendly kit I used to refresh everyone’s memory and help them source some if they wish to purchase some themselves
- The condensed “buy these to get started” list
I will write another post detailing as best I can how the bead is made, I might need some help to get useful photographs for that and I want to get some stuff posted sooner rather than later. I will not, in beginner’s posts, be touching on issues temperatures create within a glass piece apart from the absolute basics, as my emphasis is on getting things started in as straightforward and fun a way as I can, and worrying about perfection later. (“Perfection is the enemy of Good” – people worrying about doing things the “right” way are more anxious about starting something and also if I try to put everything into this post I will never finish it)
So – why did I bring modern kit to make glass beads to a medieval event? There is absolutely no question but that glass beads have been made and worn decoratively throughout the last 3000 years at least. Egyptians made a glass-like bead from tjehenet or faience – a kind of mashed up sintered quartz and sodium salts that, as a paste, was applied onto clay beads. The salts rose to the surface and when fired it hardened to form a desirable shiny, smooth surface, in that gorgeous green-blue that probably comes to mind when you think of Egyptian art.
The Romans and then later the Venetians produced stunning works in glass, and I may well write a post about that another time, but next we go to Vikings, who kindly left us a treasure trove of beads which we recreate happily all over the Known World. Vikings LOVED beads, and made them from metal, carnelian, jet, amber, glass and rock crystals. Early medieval glass tends to fall within ranges of blue, green, yellow, red, orange, and white, and as I will explain in a later post, different regions tended to like to manufacture beads in a regional set of colours. Early glassmakers achieved these colors by adding metals or salts; copper for red, blue or green, iron for black, tin for yellow. There were two main ways of making glass, either from scratch from the raw materials (of quartz and soda (natron) in earlier periods, or quartz and potash by the late tenth century) or, as today, by recycling it. Broken glass, stolen glass tiles or coloured windows from raids were melt down and used again. Fair easier than the very tricky process of producing new glass, and easy to retrieve (through trade or raiding) from lands in the east. Broken glass for recycling into new glass is called cullet.
Vikings made their glass beads as wound glass beads. This way of making beads is probably the method for the earliest beads of actual glass. At some stage some clever person noticed glass heated to a sufficiently high temperature becomes this wonderful slow moving ooze of fire colours and fascination and could be persuaded to wind around a metal spoke or mandrel of a thickness that would allow a thread or thong to be passed though the cooled glass later. As we discussed at the class, glass lain and wound directly onto the metal mandel fuses and can’t be removed from it without smashing, so the mandrel is prepared with a clay slip coating – the bead release. The nicely mobile glass, if kept in heat and turned gently, is dragged into a natural rounded shape by gravity, there is no lumpy, bumpy mass of glass that can’t be persuaded, with enough patience, into a bead shape. Maybe not perfect, but certainly uniquely interesting. After that a still hot bead can also be run over metal or wood surface to produce smoothness or ridges, specific tools to run glass over are called marvers.
Does this justify me wandering around Buckden Towers looking like a pyromaniac with a vivid yellow gas canister and interesting looking flame thrower head? It is true that truly portable glass bead making – certainly at events – is a lot easier with a little hand held torch than what would have been used in period. I had great fun in the past experimenting with clay and bellows following research into other interested historians and SCA folks’ recreations of Viking bead furnaces and I hope in the not too distant future to create a truly functional one in my new, improved, much bigger garden/workshops space but I really didn’t fancy trying to persuade our most excellent event steward to allow me to experiment with probably highly unstable clay recreations in the very lovely refectory. Also people are not as quick to man the bellows as they are to do the cool stuff over the hot fire.
There are excellent resources on designs for furnaces for anyone who wishes to go down that route. I will post about these some more some other time, but one easy and accessible place to start with if you’re interested is the Ribe Viking Centre. I will dig out my more in depth links for the later post, but Ribe is of huge significance to those interested in beadmaking site of the Viking Era, due to its archaeological finds and the museum’s active experimental, interpretative, and craft programs. There is information from Ribe to suit all levels of interest, from mild curiosity to specific and academic granularity.
Okay so let’s get to the specifics of the kit I use for introduction sessions
1) Glass

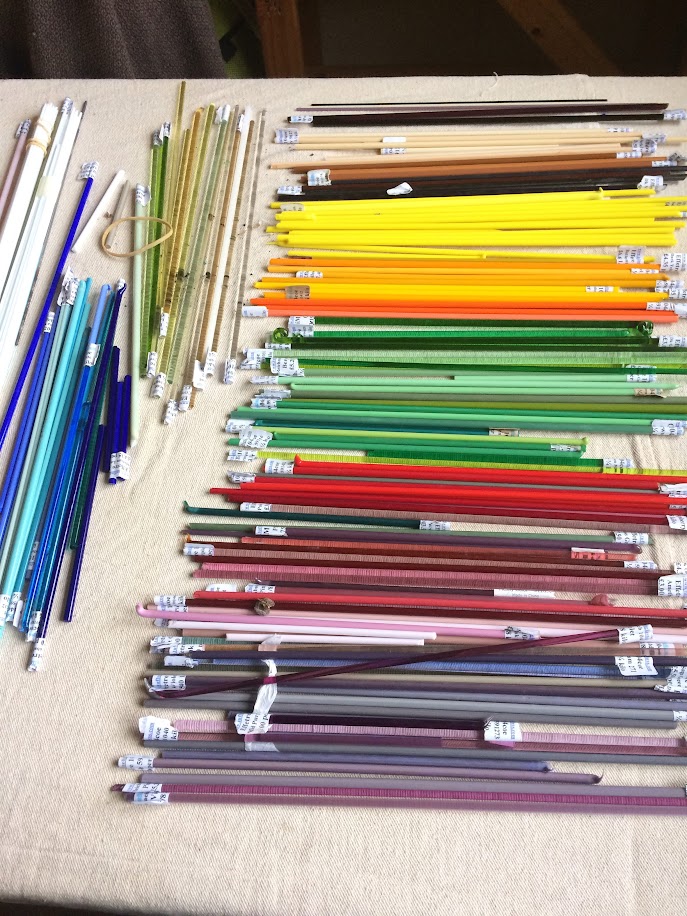
You want your glass to come preferably in an easy to handle form and in some different colours for interest.
Glass, like many things, gets complicated when you actually start looking into it. You think “I’ll just pop on to the web and buy some glass rods, like Órlaith had at the class.” and suddenly you’re being asked to pick between Borosilicate COE 33, dichronic, or COE 90, 96, 104, 120… argh!! Different glass does different jobs as it behaves in different ways, at different temperatures and so on. We can talk about that another time.
For beads I use “soft glass”, and I choose COE 104 rods. These tend to be less expensive, good quality, create good detail, have a slightly lower melting point than some others, so they’re especially good with handheld torches on the road, and they have a great colour selection. Thy are absolutely fine for small pieces and any inconsistency is unlikely to cause many issues. COE stands for Coefficient of Expansion, but at our level we absolutely do not need to know this, but some people may like to all the same. I use glass rods, some reenactors prefer to use less obviously modern forms. For the purposes of this post though, rods are pretty much ideal.
People are sometimes nervous handling glass rods. Yes you do need to mind the ends, they can be sharp. Yes they do break, but with reasonable care it doesn’t actually happen very often and heat does not travel down to where you are holding the rods, glass is not heat conductive. The tiny thin rods you might see are called stringers – they melt more quickly and are easier to manipulate to add decorations to your bead. You can make these yourself, but when you start out I recommend just buying a few. I’ll add some suppliers as links at the end of all this.
2) Mandrels AKA Metal sticks to wind the glass onto,
I’ve seen people use all kinds of things as mandrels, you basically need to make sure they won’t conduct heat to your fingers, won’t melt at the same temperature as glass and aren’t hazardous in some fashion. The thickness of the metal determines the size of the hole in your bead, so choose an appropriate size with threading and future use in mind.

3) Bead Release: protection to stop the glass sticking to the metal forever

There are so many brands of bead release out there, they all do the same job but there are things to look out for; A lot come in pots ready to dip which are very handy, and you need to watch out for ones containing free crystalline silica which may, with much use, create silicosis-related health hazards.
I started using this Tuffy release that gets shipped as a powder. It has no free crystalline silica and honestly it is so much better than any other I’ve tried I’m happy to just say you should get this. Mix it, dip your mandrels and heat over the flame to dry them out before use. Store the release in an airtight bottle or jar when not in use.
4) A way to keep the bead from cooling too rapidly and cracking with thermal shock.
When I started out I was reading things about having to have an “annealing” kiln for making beads, it very nearly put me off trying it. Annealing ovens are probably great kit, but they’re not necessary for a beginner’s kit. To anneal something means to manage heat so as to allow the glass allow to cool slowly, in order to remove internal stresses and prevent breaking, cracking. For my starter kit I have both Japanese cooling bubbles – tiny little hard hollow bubbles of mostly silica – and a fibre blanket as choices. This isn’t true annealing, it is just the best we can do to protect beads in a transportable, manageable and affordable way. When you have finished working on your bead let the glow fade, then either submerge in a container of cooling bubbles, or rest in the middle of your cooling blanket to cool slowly.
5. The means to apply heat, and fuel to provide it.
You need a torch to direct concentrated heat efficiently in a sufficiently large space to make a useful working space in the flame. It needs to be fueled by something that will generate enough heat to make the molten glass sufficiently ductile to work with but also to prevent dark, murky colours.
Actual professional or “serious” grade glass working torches are not cheap, and require setups to mix oxygen into the gas mix, it gets intimidating very quickly for absolute beginners who are just curious. I found a “Hot Head” torch, and it’s absolutely great if you just want to try it out and see how it all works. It doesn’t require additional oxygen or compressed air if you use it with MAPP gas canisters, the yellow one in the accompanying image.

My first hot head torch had a tendency to cut out after a certain amount of use, which was frustrating if you were working mid bead, but they’ve brought out an improved version (The Hot Head 2) that I’ve used with ease. The Hot Head torch is not as hot as an oxy/acetylene fuel torch, but you can still happily make soft-glass beads, marbles, and small sculptural pieces – it will be slower, more expensive and requires more attention to the flame positioning but it’s brilliant to make sure you really want to work with glass.
Propane (LPG) can be used, but to get it to work well enough not to mess up your colours you need to create a flame that is not luminous, so your torch must ideally have a way to combine air with the propane, resulting in complete combustion. There is an adaptor/regulator you can buy, it’s not a thing I would add to my recommendation for an absolute beginner’s kit, but it allows you to make use of the larger bottles of gas instead of the much smaller yellow canister I use for workshops. I have it, it works, it is cheaper but *much* slower to make things with too.
As I’ve already said there are many forms of glass you can use as a beginner, and the coe 104 glass has a melting point that makes it particularly useful for this torch. I’m not going to get too concerned about melting points at the moment, if you want to find out more there is a useful table available at https://hypertextbook.com/facts/2002/SaiLee.shtml
Mapp (or Map or Map Plus) gas higher flame temperatures and energy densities than any flame other than acetylene/oxygen, but without the dangers and inconveniences of acetylene/oxygen. MAPP has an energy content of 21000 BTU/lb (13.57 kWh/kg) while acetylene’s energy content is 25000 BTU/lb (16.15 kWh/kg) , a combustion /flame temperature of 2010 degrees celsius with just air.
6. Safety Glasses
As anyone who was at my class knows, introducing glass to flame can get a teeny bit exciting once in a while, particularly if you don’t introduce it slowly. The first thing to make sure this doesn’t cause permanent problems if it flies in unwished for directions is to make sure your eyes are protected. Secondly looking at a flame a lot is bad for your eyes, so you need to either wear lens or lens covers that give you Sodium Flare and UV Protection. They will make your world look grrooooooovyy mannn, but they’re a must have if you want to do this as a hobby. Not cheap, alas, but your eyes matter, take care of them!
7. Something to secure your gas cyclinder and a safe work surface.
Gas is dangerous, exposed flames are dangerous (and these are super hot!) and melted glass is hot and burns things! I’m sure this is all shocking information and you had no idea! You will need some sort of clamp and a heat proof surface you don’t mind getting scorched occasionally. Having kit you can rest hot glass on will save you a lot of stress and give you a way to line things up for maximum space efficiency and tool access. I resisted buying an item called the “The Torch Buddy”, which is kidney shaped plywood board with metal arms/supports that can be clamped to a work surface giving you a adjustable way to support your fore arms because it was expensive for kit that looked like I could make in some way. Just before a demo in the summer I decided to hell with it and bought it and am SO very happy that I did. I add a bit of extra securing wire to the torch holder for peace of mind, but the arm rests are just brilliant, and I figured out that while I *could* probably make something like it the chances are that I wouldn’t get around to it. A little metal rod rest gives peace of mind as to where to leave down your glass rods with the hot worked tips, and I have a block of wood with bored holes in to stick prepared mandrels in in easy reach. I tend to use tin foil to go underneath and around the area just to catch hot random bits and for when people forget about the rod rest and plonk the rod straight down on the table. Both of these images are from Tuffnell Glass, which is the site I buy most of my stuff from, so I’m hoping it’s okay I use them in return for the shout out.

I think that’s everything you need to get going, the rest of my kit consists of shapers and tools and marvers, which I’ll make another post about with illustrative images of me using them to make it easier. My next post will be a with pictures description of the process to make a straightforward bead and some of the simpler decorations, but I am between workspaces at the moment so it will take a little while, probably the Christmas holidays, before I get a chance and a body to take the photos as I work.
The Shopping list
Okay I’m going to link how to find all the above on Tuffnell Glass (https://tuffnellglass.com), there is also another UK supplier, warmglass, which I have literally just this moment discovered has an Ireland focused site (http://www.warm-glass.ie/) as well as their uk address. There are probably others, but these sites have never given me trouble and have a good delivery turnaround, so I’m happy to mention them.
- Glass – CoE 104
- Mandrels
- Bead release
- Annealing bubbles / Fibre blanket
- Hot head torch (ships as Hot Head 2)
- Map gas – available in places that cater to plumbers and serious DIY people.
- Safety Glasses (and clips on people with glasses)
- Torch Buddy
- Rod rack
I would probably add a Shaping tool because it can help to knock wonky beads back into submission but it’s not essential, and if you care about cleaning the bead release out of the bead you’ll need a reamer – I don’t have one of these but I see it also helps with cleaning up the rouch edges that can form around the hole so it’s on my next to buy list.
And that’s it, you would then have enough stuff to safely start making beads yourself.

Leave a Reply